

This very interesting yet easily overlooked topic in tech or programming caught my attention and inspired me to write about it. My involvement in a community project and role as a team lead of the project, which is open source, required me to implement this model. Although I had used this workflow before, it was the very first time I implemented it myself. This branching model is commonly used to manage workflow in projects, especially open source projects and so, I’ll advise that you pay keen attention to this topic, and practice it even in your projects, so it becomes a part of you(also speaking to myself). I mean it’s one of the things you want to look out for especially if you are interested in open source like I am; we do not want to be the person breaking production 😊
What is Gitflow?
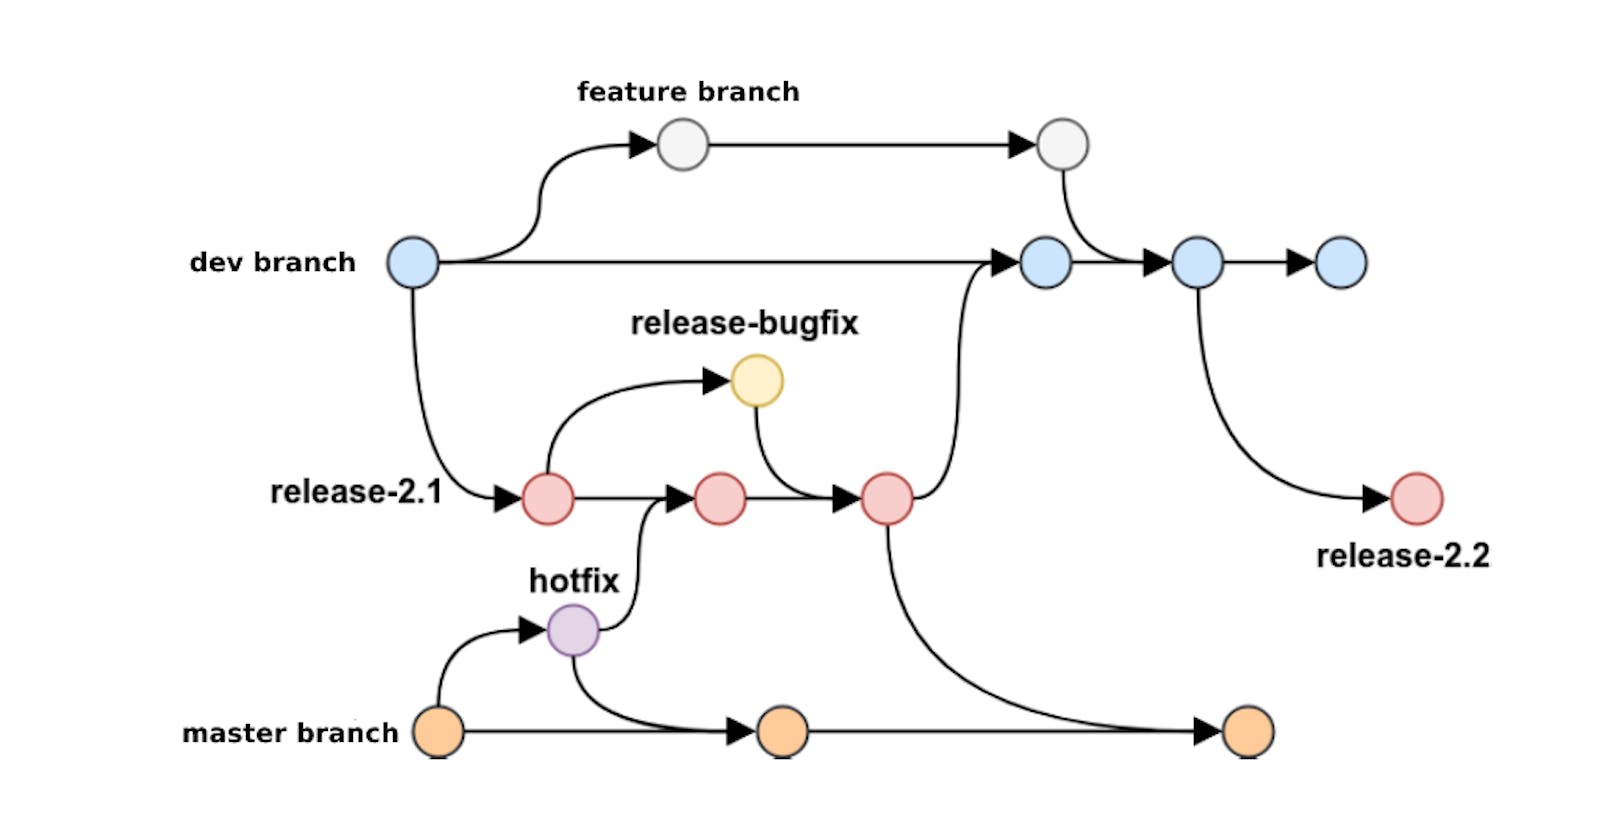
Gitflow is a branching model created by Vincent Driessen. It is an alternative git branching model that involves feature branches and multiple primary branches. It is very well suited to collaboration and scaling the development team.
You might be wondering, what problem does the gitflow branching model solve?
This branching model solves the problem of managing changes to a project with multiple developers. It does this by providing a clear and structured way to manage changes to a project. Several moving parts make it super easy for maintainers to manage changes and we’ll discuss them shortly.
Stages of Gitflow branching model
The Gitflow branching model consists of five branches, each serving a distinct purpose:
Master/Main Branch:
The main branch, often named 'master' or 'main,' represents the production-ready code.
It contains the stable and release-ready versions of the software.
Only merge changes into this branch when they are thoroughly tested and ready for deployment.
Develop Branch:
The develop branch serves as the integration branch for ongoing development.
New features and changes from various feature branches are merged into this branch.
It represents the latest state of development and is considered more stable than feature branches.
Feature Branches:
Feature branches are created for developing new features or making significant changes.
Each feature branch is created from the 'develop' branch and worked on independently.
Once a feature is complete, it can be merged back into the 'develop' branch.
Release Branches:
Release branches are used for preparing software releases.
These branches allow for finalizing a specific version, performing testing, and fixing last-minute issues.
Once the release is ready, it is merged into both the 'main' and 'develop' branches.
Hotfix Branches:
Hotfix branches are reserved for addressing critical bugs or issues in the production code.
They are created from the 'main' branch and enable quick fixes without disrupting ongoing development.
Once the hotfix is complete, it is merged into both the 'main' and 'develop' branches.
By following this structured branching model, teams can effectively manage development, integration, releases, and hotfixes, resulting in a more organized and stable development workflow.
Getting Started
What you should put in mind when working with gitflow is everything in there is all branches. The regular way we would create branches when pushing our projects, yeah that's it.
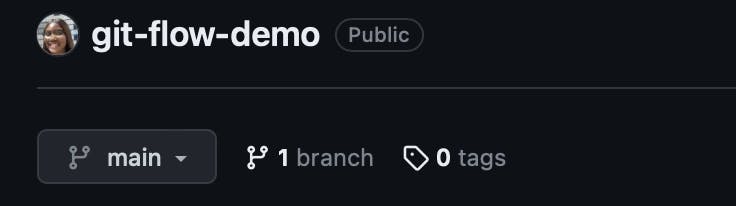
To get started, I created a new repo on GitHub and added a readme; you might want to do that too if you wish but I'll assume you have a repository already and when you do check the branch on the repo, you should see the main branch.
Next up, you should have the repository on your local machine-you could easily clone this. Now, let's get into this properly. To initiate a git flow branching model to your codebase, you would run git flow init and when you do, you should see a list of commands like so, press enter until the final command.
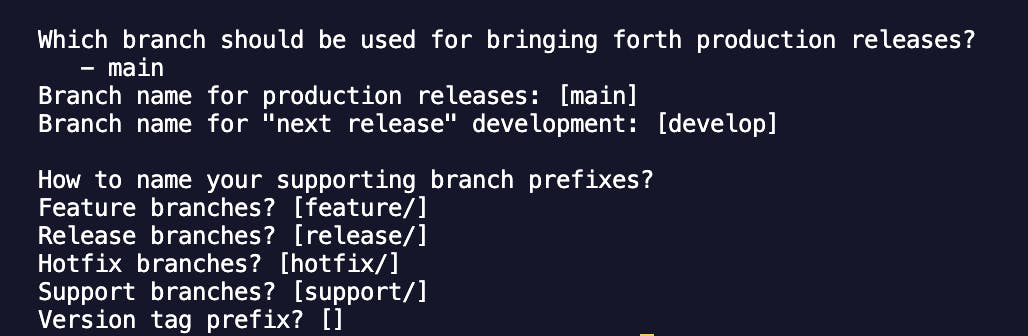
You should get something like this in the image above and when you run git branch, you will find that we are now on the 'develop' branch.

You're making good progress, GREAT JOB!!! 👏🏾
Next up, I'll be pushing a simple html file I created to the repository to the 'develop' branch. To do this, run: git flow feature start my-feature you should see this:
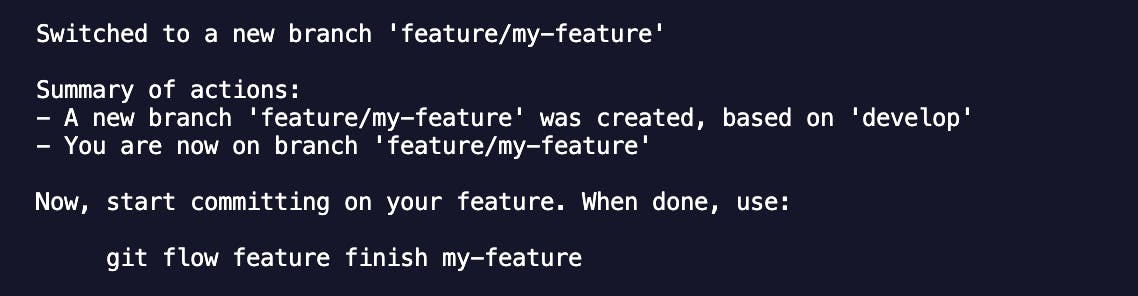
You can see that we have created a new branch based on the 'develop' branch which is exactly what we want and we are also on the feature branch. This means when we make a commit now it will not be pushed directly to the develop branch instead it'll be on your feature branch which is exactly what we want.
Worthy to note that you could replace "my-feature" with a descriptive name for your feature branch. This command creates a new branch based on the 'develop' branch and switches to it.
After working on your feature or making every necessary change or addition, run git flow feature finish my-feature This command merges your feature branch into the 'develop' branch, and it will prompt you to provide a commit message summarizing the changes made in the feature branch. However, in a production setting, as a contributor, you should push that feature to the develop branch like you usually would and then make a pull request(PR) which will be reviewed and merged into the branch.
As a maintainer, assuming all your features are production-ready, then, you are good to finish the feature and then cut a release to the main branch and version it as well.
After running the git flow feature finish my-feature command, you should see this next:
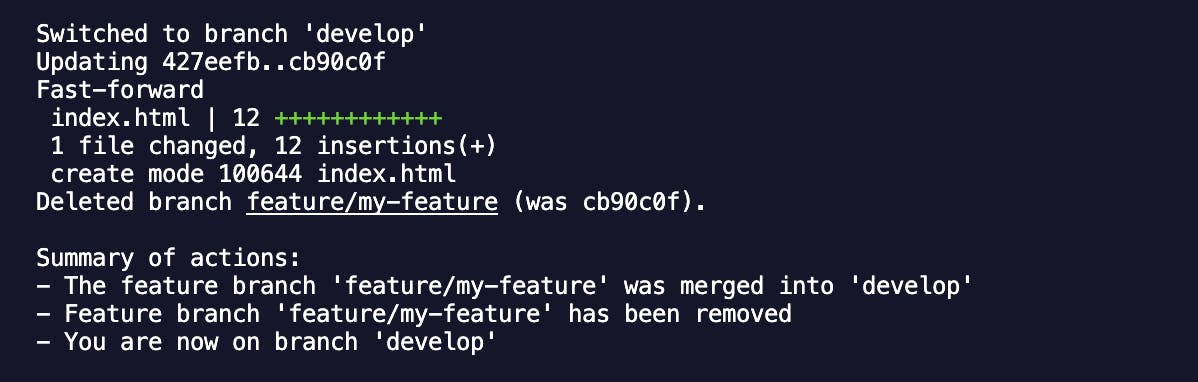
You can see that your feature branch was successfully merged, the branch automatically deleted and back to the 'develop' branch.
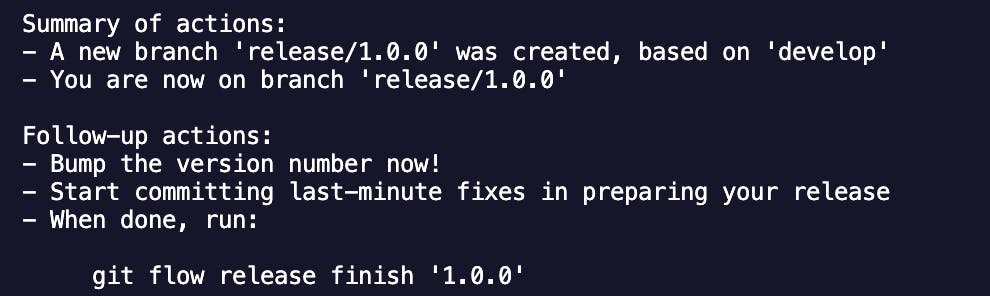
After completing the development of features in the 'develop' branch, the next step in the Git Flow branching model is to cut a release branch. To do this, run this command git flow release start 1.0.0. You can go ahead and replace "1.0.0" with the version number for your release. This command creates a new branch based on the 'develop' branch and switches to it.
Here's what you should see on your terminal.
You can perform any necessary release-specific tasks in the release branch, such as updating version numbers, finalizing documentation, or conducting testing.
Once the release is ready, finish the release by merging it back into both the 'develop' and 'main' branches. To do that, run this command: git flow release finish 1.0.0. This command merges the release branch into both the 'develop' and 'main' branches. It will prompt you to provide a commit message summarizing the changes made in the release branch, and it will also create a tag for the release.
You might be stuck after writing your commit message especially if you are not familiar with Vim editor -assuming that's your default- to proceed, press the
esckey on your computer and type:wqto write the changes and exit the Vim editor.
Once this is done, Git will proceed with the commit using the provided message, and the release branch will be deleted immediately as shown below.
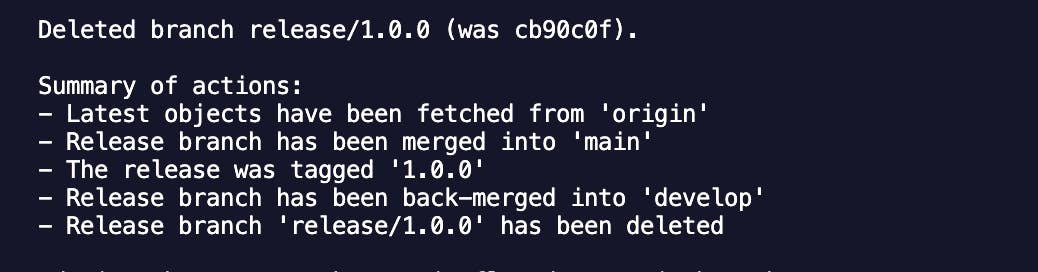
As you can see, we have successfully finished the release branch and merged it into both the 'main' and 'develop' branches. The release has been tagged as '1.0.0', and the release branch 'release/1.0.0' has been deleted. Now, go ahead and run git checkout main to switch to the main branch. After executing this command, any subsequent Git operations will be performed on the 'main' branch unless you switch back to another branch.
If there's a bug that needs to be fixed or an improvement that needs to be made in your project, you could create a 'hotfix' branch.
Make sure you are in your main branch; to check, run this command: git branch if you're not, run git checkout main
Start a new hotfix branch based on the latest 'main' branch: git flow hotfix start 1.0.1
Do not forget to replace '1.0.1' with an appropriate version number for your hotfix.
Once you have completed the hotfix, finish it by running: git flow hotfix finish 1.0.1. This command merges the hotfix branch into both 'main' and 'develop', creates a tag for the hotfix, and prompts you for a commit message summarizing the changes made in the hotfix. Push the changes and tags to the remote repository by running these commands: git push origin main and git push origin --tags
These steps will successfully merge the hotfix branch to the 'main' and 'develop' to keep them updated.
Benefits
Improved Code Quality:
Code isolation in separate branches ensures high-quality development without introducing bugs or errors into the main branch.
Each feature can be developed independently, reducing the risk of code conflicts and improving overall code stability.
Easier Collaboration:
Developers can work on their feature branches, enhancing productivity and reducing the chances of conflicts.
Clear separation of work enables parallel development and efficient collaboration among team members.
Streamlined Release Process:
Gitflow provides a well-defined process for managing releases, including creating release branches, testing, and merging into the main branch.
Releases are well-tested and can be integrated smoothly into the main branch, minimizing disruptions.
Support for Hotfixes:
- Hotfix branches allow for quick bug fixes in the production environment, minimizing the impact on users and ensuring prompt issue resolution.
Reduced Risk of Merge Conflicts:
By merging changes into the main branch only when they are complete and tested, Gitflow helps reduce the risk of merge conflicts.
Separation of development stages reduces the chances of conflicting changes and ensures smoother integration.
Improved Visibility and Communication:
Gitflow provides a clear overview of the development process, enhancing communication and collaboration between team members.
Team members can easily understand the state of the codebase and track progress.
Support for CI/CD:
Gitflow aligns well with CI/CD practices by providing a structured process for merging code into the main branch and releasing new features.
It facilitates seamless integration of code changes, testing, and continuous delivery.
Conclusion
In this tutorial, we have explored the Gitflow branching model and learned how to apply it to your project workflow. By following the step-by-step instructions, you have gained a practical understanding of how to set up branches, create feature branches, merge them back into the main development branch, and even cut releases or hotfix branches when needed.
Gitflow comes in handy and helps streamline collaboration, improve version control, and ensure a structured branching model that promotes stability and scalability. I encourage you to apply the concepts learned from this tutorial to your projects.
Note: The Gitflow branching model is one popular branching strategy among several others used in software development. Some other commonly used branching models include Feature Branching, Trunk-Based Development, and GitHub Flow.
While Gitflow is a popular and well-established branching model, it's essential to explore different strategies and select the one that best suits your project's needs and team dynamics.
Happy branching! 🌿